Sign & Labels

ANSI Z535 and the OSHA 1910.14 Specifications for Accident Prevention Safety Signs require the use of safety signs to indicate specific hazards that, without identification, may lead to accidental injury to workers and/or the public, or lead to property damage. Keep signs simple and concise, but also make sure they communicate sufficient information so that the message is clear. OSHA compliant safety labels should be designed to the same standards as safety signs. For example, they should use the same colors as signs. Be consistent in your design so that your labels look like your signs. Variations in design can result in confusion and result in more time needed to read and understand the label. Consistent design of labels and signs, the colors used, how safety symbols are used, and what the header looks like all help communicate critical information quickly.

Types & Meanings:

Danger signs :

Indicate an immediate hazard which, if not avoided, will result in death or serious injury. Danger signs should be limited to the most extreme situations and signify that special precautions are necessary. The heading “DANGER” is printed in white letters on a red background and is preceded by the safety alert symbol (an equilateral triangle surrounding an exclamation mark). The message should be printed in black or red letters on a white background, or white letters on a black background. Additional safety symbols may be included in the message area.

Warning signs:

Represent a hazard level between caution and danger. “Warning” indicates a hazardous situation which, if not avoided, could result in death or serious injury. The heading “WARNING” (preceded by the safety alert symbol) is written in black on an orange background. Additional wording and safety symbols are printed in black on the lower portion of the sign. Warning signs and labels can be any size, but it is appropriate for the sign to be noticed and easily read from a safe distance. They need to communicate the warning information before someone is in a dangerous area or acts in a dangerous manner.

Caution sign :

Indicates a potentially hazardous situation which, if not avoided, may result in minor or moderate injury. Caution signs are used in areas where potential injury or equipment damage is possible, or to caution against unsafe practices. Caution signs should only be used if there is a risk of personal injury. The heading “CAUTION” is written in black letters on a yellow background and is preceded by the safety alert symbol. The message and safety symbols in the body of the sign are printed in black.  Biological Hazard signs. According to OSHA §1910.145(e)(4), “The biological hazard warning shall be used to signify the actual or potential presence of a biohazard and to identify equipment, containers, rooms, materials, experimental animals, or combinations thereof, which contain, or are contaminated with, viable hazardous agents… presenting a risk or potential risk to the well-being of man.” The symbol design must conform to the design as shown in the “BIOHAZARD” sign and contain the word “Biohazard” or “Biological Hazard.” The biohazard symbol can be black, fluorescent orange, or orange-red color. Background color is optional as long as there is sufficient contrast for the biohazard symbol to be clearly defined. A biohazard can also be indicated on a danger or warning sign and may include the safety alert symbol.

Notice signs:

Provide general information that is important or relevant to a building, an area, a machine, or equipment. Notice signs address practices not related to personal injury. The heading “NOTICE” should be in white italic letters on a blue background. Notice signs should never include the safety alert symbol. The body of the sign is white, and the message is in blue or black lettering on a white background, or white lettering on a black background. Safety symbols can be printed in either blue or black. Notice signs can include information about procedures, operating instructions, maintenance information, rules, or directions. Notice signs are never used for personal injury hazards or warnings, but can be used to indicate possible equipment or property damage.

General Safety:

Signs are used to provide notices of general practice and rules relating to health, first aid, medical equipment, sanitation, housekeeping, and suggestions relative to general safety measures. Signs containing safety instructions or procedures should use heading “SAFETY INSTRUCTIONS” or “SAFETY PROCEDURES.” Where practical, use a more definitive heading, such as “SAFETY SHUTDOWN PROCEDURE.” Signs indicating the location of safety equipment should use a specific header such as “EYEWASH.” If multiple safety items are in the same location, simply use the header “SAFETY EQUIPMENT.” The message and safety symbols should be printed in green or black on a white background. The signs may also be printed in white on a green background. These signs should never include the safety alert symbol.

Fire Safety :

Signs are used to indicate the location of emergency fire fighting equipment. Unlike other signs, they do not require a header. The message and safety symbol are printed in red on a white background, or in white on a red background. Because these signs do not indicate a personal safety hazard, the safety alert symbol must not be used. Fire safety signs are not used to show the direction to fire equipment, but rather its immediate location .

Admittance signs:

Bridges all of the above categories. Admittance messages may be included on a sign with any header. You might decide to put “Unauthorized Personnel, Keep Out” on a danger, warning, caution, or notice sign. You may choose to include an admittance message on a general safety sign. The type of header and message content should be determined by the personal risk (if any) or consequences of entering the restricted area. The primary action statement should be simple, direct, and applicable to the hazard. Keep only essential hazard-related information on the sign. If necessary, consideration can be given to referring the viewer to another source for additional safety information or for permission to proceed. When information on consequence, avoidance, or type of hazard is readily inferred, this information may be omitted from the message panel.

Safety Symbols :

Signs and labels may include safety symbols, often called pictograms pictorials, or glyphs. Safety symbols can portray required actions, consequences, explicit direction, or the effects of interaction with certain chemicals, machines, and other hazards. Signs and labels may include more than one pictorial to show a sequence of events for one hazard. Safety symbols should be consistent, readable, and easily understood. They usually consist of a black image on a white background.

Surround Shapes – You may consider using a surround shape. However, a surround shape will decrease the available space for a symbol. Surround shapes should not be used if they detract from the major message.

HAZARD ALERTING – You can use this surround shape to highlight a hazardous condition. The symbol should be drawn within a black equilateral triangle and can include a yellow background.

MANDATORY ACTION – This type of symbol conveys actions that must be taken to avoid hazards. This symbol consists of a white image within a solid blue or black circle. PROHIBITION – For actions that should not be taken, this surround shape is required. It consists of a red or black circle with a diagonal slash at 45° from the upper-left to the lower-right.

INFORMATION – The square (or rectangular) surround shape is typically used to convey equipment location, places of exit, and permitted actions.

Safety Symbols:

When appropriate, you may use a graphic representation that conveys your message without using words. The safety symbol should “describe the type of hazard, or evasive/avoidance actions to be taken” ANSI Z535.2-2007 (8.1.2). Safety symbols should effectively communicate the message, be easily understood, and be visible from a safe distance.

Message Panel – The message panel describes a hazard, indicates how to avoid it, and advises workers of the consequences of not avoiding the hazard. Always follow these basic guidelines:

• Use left-aligned text

• Use sentence-style capitalization

• Use sans-serif fonts (such as Helvetica)

• Avoid prepositional phrases

• Write in “headline style”

• Use active voiceWhen determining the order of the message content, consider the target audience’s prior knowledge of the hazard and the necessary reaction time required to avoid dangerous consequences. Also, make sure that the most urgent message is the most prominent. OSHA 1910.145(e)(2) states: “The wording of any sign should be easily read and concise. The sign should contain sufficient information to be easily understood. The wording should make a positive, rather than negative suggestion and should be accurate in fact.”

Employee Training

Employers are required to conduct training to ensure workers understand the various types and meanings of signs in their facilities. The best time to train is during new hire safety orientation and during annual safety refreshers. Showing and explaining safety signs and their meanings in company newsletter and on employee bulletin boards will also help improve employees’ awareness of hazard signs. Effective employee training includes showing every type of sign, tag and label used. You should also provide an explanation of each purpose, meaning and what you expect employees to do when they encounter specific signs, labels or tags. Take special care to fully show and explain your hazard communication – chemical safety labeling program, which is also required by OSHA.

Sign Placement

Place hazard signs as close to the hazard as possible to create a definite link between the message and the hazard. Placing a group of hazard signs on a door, entryway or wall is asking for confusion. Let’s take a look at a typical plant maintenance shop. Every bench mounted tool should have hazard signs posted that require the use of eye protection and any other operation hazard that is applicable to the specific tool. These signs should be placed so that they are highly visible to the tool operator.

How you treat your signs sends a message:

Over time signs become faded, damaged and totally useless for the intended hazard message. Outdated, faded or damaged signs send a negative message about your emphasis on safety. To show employees that the hazard sign messages are important, replace them (the signs not the employees) as soon as they have any wear or damage. Have replacement signs available – stock enough replacement signs so there is no wait when a sign needs to be replaced.

Sign Language Barrier:

Being able to employ a diverse language workforce is essential in some industries. Using pictogram type safety signs to convey a hazard message can break reading or language barriers. To ensure that non-English speaking employees understand, some companies are employing translators to accompany trainers on facility tours with new employees to explain specific signs and their meanings. The food industry, which employees many non-English speaking Hispanic workers has seen the importance of bilingual signs. While bilingual signs are helpful, experience has shown that, as an example, not all “Hispanic” peoples speak or read the Spanish language the same – many words have entirely different meanings to various groups of peoples classified as “Hispanic”. The same is true for many other ethnic groups.

Temporary Signs:

Certain operations may require the use of temporary visual warning. One of the most familiar is the “wet floor” sign placed by custodians. Others include those placed at boundaries of electrical work areas, confined space entry operations, temporary containment for asbestos removal or chemical spill cleanup. OSHA also requires that if work exposes energized or moving parts that are normally protected, danger signs must be displayed and barricades erected, to warn other people in the area.

Information Signs

Beyond the typical “Notice” signs, there is sometimes the need for more detailed information signs that provide complex instructions. Generally, these are in the form of Posted Operating Instructions for equipment or processes that require specific step-by-step procedures to ensure safe operation. Plastic laminated paper instruction can be used in areas that are clean and dry, however, photoengraved metal signs will last longer, especially in areas that have wet or dirty operations.

Exit Signs:

OSHA requires that Exits be marked by a readily visible sign with plainly legible letters not less than 6 inches high and illuminated on the surface to at least a value of 5 foot-candles. Most “glow in the dark” signs do not meet this lighting requirement. Access to exits must also be marked by signs showing the direction (arrows) of the exit or way to reach it. Additionally, any door, passage, or stairway which is neither an exit nor a way of exit access, and which may be mistaken for an exit, must be identified by a sign reading “Not an Exit” or by a sign indicating its actual use, such as “To Basement,” “Storeroom,” “Linen Closet,” or the like.

Chemical Hazards:

In the workplace, OSHA’s Hazard Communication Standard requires that each container of hazardous chemicals is labeled, tagged or marked. The identity of the hazardous chemical and appropriate hazard warnings, words, pictures, symbols must provide at least general information regarding the hazards of the chemical. Signs, placards, process sheets, batch tickets, operating procedures, or other written materials may be substituted for labels on individual stationary process containers, as long as this method identifies the containers to which it is applies and provides the same information required on labels. Small, portable containers, intended only for the immediate use of an employee and not for storage, do not require labels. Existing labels on containers, provided by the manufacturer, may not be removed or defaced unless the container is immediately marked with the required information.

Employee protection in public work areas:

Before work is begun in the vicinity of vehicular or pedestrian traffic which may endanger employees, warning signs and/or flags or other traffic control devices must be placed conspicuously to alert and channel approaching traffic. At night, warning lights must be prominently displayed.

Aisles And Passageways:

Permanent aisles and passageways have to be appropriately marked.

Welding & Brazing:

All filler metals and fusible granular materials must show the following notice on tags, boxes, or other containers:

CAUTION

Welding may produce fumes and gases hazardous to health. Avoid breathing these fumes and gases. Use adequate ventilation. See ANSI Z49.1-1967 Safety in Welding and Cutting published by the American Welding SocietyBrazing (welding) filler metals containing cadmium in significant amounts must have the following notice on tags, boxes, or other containers.

WARNING

CONTAINS CADMIUM

POISONOUS FUMES MAY BE FORMED ON HEATING

Do not breathe fumes. Use only with adequate ventilation such as fume collectors, exhaust ventilators, or air-supplied respirators. See ANSI Z49.1-1967. If chest pain, cough, or fever develops after use, call physician immediately.

Brazing and gas welding fluxes containing fluorine compounds shall have a cautionary wording to indicate that they contain fluorine compounds. One cautionary wording recommended by the American Welding Society for brazing and gas welding fluxes reads as follows:

CAUTION

CONTAINS FLUORIDES

This flux when heated gives off fumes that may irritate eyes, nose, and throat.Avoid fumes — use only in well-ventilated spaces.Avoid contact of flux with eyes or skinDo not take internally

Permit-Required Confined Spaces:

Exposed employees must be informed of the existence and location of and the danger posed by permit-required confined spaces through the posting of signs or by any other equally effective means. A sign reading “DANGER—PERMIT-REQUIRED CONFINED SPACE, DO NOT ENTER” or using other similar language would satisfy the requirement for a sign.

Lockout/Tagout:

Tagout devices must warn against hazardous conditions if the machine or equipment is energized and shall include a legend such as the following: Do Not Start, Do Not Open, Do Not Close, Do Not Energize, Do Not Operate.

Fixed Extinguishing Systems:

Hazard warning or caution signs must be posted at the entrance to, and inside of, areas protected by fixed extinguishing systems which use agents in concentrations known to be hazardous to employee safety and health.

Ladders:

Ladders that have developed defects have to be taken out of service for repair or destruction. They must be tagged or marked as follows:DANGEROUS, DO NOT USE

Flammable Liquids:

Storage cabinets where flammable and combustible liquids are stored must be conspicuously labeled, “FLAMMABLE—KEEP FIRE AWAY.”

No Smoking Signs:

Near all Explosive Storage AreasAll spraying areas and paint storage roomsPowder coating areas and powder storage roomsAreas where organic peroxides are stored, mixed, or applied.Drying, Curing, Or Fusion ApparatusNear Dip Tanks Containing Flammable or Combustible LiquidsNear Bulk Flammable Storage Areas

Emergency Respirators:

The employer must ensure that respirators are stored in compartments or in covers that are clearly marked as containing emergency respirators.

Other Required Signs:

Other hazard signs and labels are required by OSHA and DOT for special industries, uses of industrial gases and equipment hazards.

Managing Safety Signs & Labels

 Humans are extremely dependent on visually communicated information. This is especially true in the workplace. Whether it’s recognition of changes, color, or movement, visual clues are essential for recognizing, controlling and avoiding hazards.Use of signs, labels and tags to visually convey hazard information to employees is required by 29CFR 1910.145 and other OSHA standards such as those for hazard communication, egress, confined space and bloodborne pathogens. OSHA standard 1910.145 covers the design, application and use of signs or symbols to identify specific hazards that could lead to injury, illness or property damage. OSHA has incorporated, by reference, the American National Standard Z53.1-1967 for specific sign color, size, lettering and contrast. To be effective, the wording of signs should be brief, easily read and understood. Wording should make a positive, rather than negative statement.

Employee Training

Employers are required to conduct training to ensure workers understand the various types and meanings of signs in their facilities. The best time to train is during new hire safety orientation and during annual safety refreshers. Showing and explaining safety signs and their meanings in company newsletter and on employee bulletin boards will also help improve employees’ awareness of hazard signs. Effective employee training includes showing every type of sign, tag and label used. You should also provide an explanation of each purpose, meaning and what you expect employees to do when they encounter specific signs, labels or tags. Take special care to fully show and explain your hazard communication – chemical safety labeling program, which is also required by OSHA.

Signs, Tags & Labels:

Confined spaces
Exits & exit ways
Flammable storage
High noise
Respirator required
Eye hazard
Biohazard
Emergency stop
Low overhead
Empty gas cylinder
Restricted access
Hardhat required
Hot surfaces
Voltage ratings
High voltage
Pipe flow direction
Contents of piped systems
Automatic equipment
Removable machine guards
Chemical storage
Sprinkler controls
Forklift traffic
Machine hazards
No Smoking
Out of Service
Lockout points
Chemical information
MSDS location
Emergency exit map

Materials Handling

Materials Handling

For an effective materials handling and storage program, managers must take an active role in its development. First-line supervisors must be convinced of the importance of controlling hazards associated with materials handling and storing and must be held accountable for employee material handling safety training. Safe lifting is only one aspect of material handling; transporting the load safely is the other. How you move or carry and put down the load is just as important as how you pick it up.

Moving, Handling, and Storing Materials:

When manually moving materials, employees should seek help when a load is so bulky it cannot be properly grasped or lifted, when they cannot see around or over it, or when they cannot safely handle the load.

Handles or holders should be attached to loads to reduce the chances of getting fingers pinched or smashed. Workers also should use appropriate protective equipment. For loads with sharp or rough edges, wear gloves or other hand and forearm protection. In addition, to avoid injuries to the eyes, use eye protection. When the loads are heavy or bulky, the mover also should wear steel-toed safety shoes or boots to prevent foot injuries if he or she slips or accidentally drops a load.

All stacked loads must be correctly piled and cross-tiered, where possible. Precautions also should be taken when stacking and storing material. Stored materials must not create a hazard. Storage areas must be kept free from accumulated materials that cause tripping, fires, or explosions, or that may contribute to the harboring of rats and other pests.

When stacking and piling materials, it is important to be aware of such factors as the materials’ height and weight, how accessible the stored materials are to the user, and the condition of the containers where the materials are being stored. Non-compatible material must be separated in storage. Employees who work on stored materials in silos, hoppers, or tanks, must be equipped with lifelines and safety belts.

All bound material should be stacked, placed on racks, blocked, interlocked, or otherwise secured to prevent it from sliding, falling, or collapsing. A load greater than that approved by a building official may not be placed on any floor of a building or other structure. Where applicable, load limits approved by the building inspector should be conspicuously posted in all storage areas.

When stacking materials, height limitations should be observed. For example, lumber must be stacked no more than 16 feet high if it is handled manually; 20 feet is the maximum stacking height if a forklift is used. For quick reference, walls or posts may be painted with stripes to indicate maximum stacking heights.

Used lumber must have all nails removed before stacking. Lumber must be stacked and leveled on solidly supported bracing. The stacks must be stable and self-supporting. Stacks of loose bricks should not be more than 7 feet in height. When these stacks reach a height of 4 feet, they should be tapered back 2 inches for every foot of height above the 4-foot level. When masonry blocks are stacked higher than 6 feet, the stacks should be tapered back one-half block for each tier above the 6-foot level. Bags and bundles must be stacked in interlocking rows to remain secure. Bagged material must be stacked by stepping back the layers and cross-keying the bags at least every ten layers. To remove bags from the stack, start from the top row first. Baled paper and rags stored inside a building must not be closer than 18 inches to the walls, partitions, or sprinkler heads.

Check chain slings during inspection:

A competent person should inspect chain slings periodically, according to the manufacturer’s recommendations. For record keeping purposes it is useful if each chain has a metal tag with an identification number and load limit information. Information about the chain length and other characteristics and an inspection schedule should be recorded in a log book.

  • Clean sling before inspection.
  • Hang the chain up or stretch the chain out on a level floor in a well-lighted area. Remove all twists. Measure the sling length. Discard if a sling has been stretched.
  • Make a link-by-link inspection and discard if:

a) Wear exceeds 15% of a link diameter.

Curved Chain Sling

Cut, nicked, cracked, gouged, burned, or corrosion pitted.

Damaged Chain Sling

c) Twisted or bent.

Twisted or Bent Chain Slings

d) Stretched. Links tend to close up and get longer.

Stretched Chain Sling

  • Check master link, load pins and hooks for any of the above faults. Hooks should be removed from service if they have been opened more than 15% of the normal throat opening, measured at the narrowest point, or twisted more than 10° from the plane of the unbent hook.
  • Manufacturers’ reference charts show sling and hitch capacities. Record manufacturer, type, load limit and inspection dates.

Use chain slings safely:

  • Always know how to properly use the equipment, slinging procedures before attempting the lift operation.
  • Inspect the slings and accessories before use for any defects.
  • Replace broken safety latches.
  • Find out load weight before lifting.
  • Check whether chain slings fit freely. Do not force, hammer or wedge chain slings or fittings into position.
  • Keep hands and fingers from between load and chain when tensioning slings and when landing loads.
  • Ensure the load is free to be lifted.
  • Make a trial lift and trial lower to ensure the load is balanced, stable and secure.
  • Balance the load to avoid overstress on one sling arm or the load slipping free.
  • Lower the working load limit if severe impact may occur.
  • Pad sharp corners to prevent bending links and to protect the load.
  • Position hooks of multi-leg slings facing outward from the load.
  • Do not leave suspended loads unattended.
  • Cordon off the area.
  • Reduce the load limit when using chain in temperatures above 425°C (800°F).
  • Store chain sling arms on racks in assigned areas and not lying on the ground. The storage area should be dry, clean and free of any contaminants which may harm the sling.

Materials Handling – Lifting With Eye Bolts:

How should you select the right bolt:

Eye bolts are marked with their thread size NOT with their rated capacities. Make sure you select the correct eyebolt based on its type and capacity for the lift you are conducting.

  • Use plain or regular eye bolts (non-shoulder) or ring bolts for vertical loading only. Angle loading on non-shoulder bolts will bend or break them.
  • Use shoulder eye bolts for vertical or angle loading. Be aware that lifting eye bolts at an angle reduces the safe load.
  • Follow the manufacturer’s recommended method for angle loading.

Incorrect use of shoulder bolt

Shoulder eye bolt with load correctly applied

Incorrect way of applying angle load

Use eye bolts safely:

  • Orient the eye bolt in line with the slings. If the load is applied sideways, the eye bolt may bend.
  • Pack washers between the shoulder and the load surface to ensure that the eye bolt firmly contacts the surface. Ensure that the nut is properly torqued.
  • Engage at least 90% of threads in a receiving hole when using shims or washers.
  • Attach only one sling leg to each eye bolt.

Attach only one sling leg to each eye bolt

  • Inspect and clean the eye bolt threads and the hole.
  • Screw the eye bolt on all the way down and properly seat.
  • Ensure the tapped hole for a screw eye bolt (body bolts) has a minimum depth of one-and-a-half times the bolt diameter.
  • Install the shoulder at right angles to the axis of the hole. The shoulder should be in full contact with the surface of the object being lifted.
  • Use a spreader bar with regular (non-shoulder) eye bolts to keep the lift angle at 90° to the horizontal.
    • Use eye bolts at a horizontal angle greater than 45°. Sling strength at 45° is 71% of vertical sling capacity. Eye bolt strength at 45° horizontal angle drops down to 30% of vertical lifting capacity.
    • Use a swivel hoist ring for angled lifts. The swivel hoist ring will adjust to any sling angle by rotating around the bolt and the hoisting eye pivots 180°.

What should you avoid when using eye bolts:

  • Do not run a sling through a pair of eye bolts: this will reduce the effective angle of lift and will put more strain on the rigging.
  • Do not force the slings through eye bolts. This force may alter the load and the angle of loading.
  • Do not use eye bolts that have been ground, machined or stamped.
  • Do not use bars, grips or wrenches to tighten eye bolts.
  • Do not paint an eye bolt. The paint could cover up flaws.
  • Do not force hooks or other fittings into the eye; they must fit freely.
  • Do not shock load eye bolts.
  • Do not use a single eye bolt to lift a load that is free to rotate.
  • Do not use eye bolts that have worn threads or other flaws.
  • Do not insert the point of a hook in an eye bolt. Use a shackle.

Use a shackle

Materials Handling – Overhead Crane Operation

What should you do before moving a load:

  • Ensure all loose materials, parts, blocking and packing have been removed from the load before lifting.
  • Remove any slack from the sling and hoisting ropes before lifting the load.
  • Make sure that the lifting device seats in the saddle of the hook.
  • Verify that the load is not heavier that the maximum load capacity.

How should you move loads safely:

  • Move crane controls smoothly. Avoid abrupt, jerky movements of the load.
  • Follow signals only from one slinger in charge of the lift, except a stop signal.
  • Make sure everyone is away from the load before hoisting. Sound a bell, siren or other warning device and start to hoist slowly.
  • Ensure nothing links or catches on the load while raising it or traveling.
  • Ensure that nothing obstructs the movement of a load.
  • Keep the load under control when lowering a load. If the braking system stops working, the load can usually be lowered by reversing the hoist controller to the first or second point.
  • Do not lower the load below a level that corresponds to less than two full wraps of wire rope left on the drum.
  • Stay in a crane cab during power failure. Place controls in “off” position, attract attention and wait for help.

What should you do before leaving the crane:

  • Remove the load hanging on crane hooks.
  • Raise all hooks to a mid-position.
  • Spot the crane at a designated location.
  • Before closing the main switch, make sure that all controllers are in the “off” position.

What should you avoid when operating an overhead crane:

  • Do not carry anything in your hands when going up and down ladders. Items that are too large to go into pockets or belts should be lifted to or lowered from the crane by rope.
  • Do not operate a crane if limit switches are out of order, or if cables show defects.
  • Do not lower the blocks below the point where less than two full wraps of cable remain on the drum.
  • Do not attempt lifts beyond the rated load capacity of a crane or slings.
  • Do not lift a load from the side. Centre the crane directly over the load before hoisting to avoid swinging the load.

Overhead Crane Operation

  • Do not allow anyone to ride on a load or hooks.
  • Do not leave slings dangling from the load hook. Have sling hooks placed on the sling ring when carrying slings to the load.
  • Do not raise loads higher than necessary to clear objects.
  • Do not pass a load over workers.
  • Do not reverse a motor until it has come to a full stop except to avoid accidents.
  • Do not walk on the crane runway.
  • Do not leave suspended loads unattended.

Materials Handling – Synthetic Web Slings

Synthetic web slings are a good choice where highly finished parts or delicate equipment must be protected from damage. The synthetic material has stretch and flexibility to help the slings mold to the shape of the load, gripping securely, while cushioning and absorbing shock more than a wire rope or chain.

  • They are lightweight and very easy to handle.
  • They are non-sparking, non conductive and can be used safely in explosive atmospheres.
  • Synthetic slings are typically not affected by grease, oil, moisture and certain chemicals. Check with the manufacturer to determine which conditions apply to the exact material you are using.
  • Synthetic web slings are easily cut and have poor abrasion resistance when compared with chain and wire rope slings. Protect webbing from sharp corners, protrusions, or abrasive surfaces.
  • Protect slings from heat sources such as steam pipes, open flame and welding splatter.
  • Nylon slings are damaged by acids, but resist caustics.
  • Polyester slings are damaged by caustics but resist acids.
  • Wet frozen slings will have a reduced load capacity. Follow manufacturer’s recommendations.
  • Sunlight, moisture, and temperatures above 82.2°C (180°F) damage both nylon and polyester slings.
  • Use slings made of the right material for the job.
  • Check the manufacturers’ slings for their code number and the rated capacity. Reference charts showing slings and hitch rated capacities are available from manufacturers.
  • Inspect slings before using them.
  • Keep an inspection record for each sling.
  • Replace damaged slings, or repair only according to manufacturer’s recommendations.

Materials Handling – Hoist Wire Rope:

visually inspect wire ropes:

  • Use the “rag-and-visual” method to check for external damage. Grab the rope lightly and with a rag or cotton cloth, move the rag slowly along the wire. Broken wires will often “porcupine” (stick out) and these broken wires will snag on the rag. If the cloth catches, stop and visually assess the rope. It is also important to visually inspect the wire (without a rag). Some wire breaks will not porcupine.
  • Measure the rope diameter. Compare the rope diameter measurements with the original diameter. If the measurements are different, this change indicates external and/or internal rope damage.
  • Visually check for abrasions, corrosion, pitting, and lubrication inside rope. Insert a marlin spike beneath two strands and rotate to lift strands and open rope.

How to check the interior of the rope

Wire rope elements
Wire rope elements

When should you stop using the rope and remove it from use:

Assess the condition of the rope at the section showing the most wear. Discard a wire rope if you find any of the following conditions:

  • In running ropes (wound on drums or passed over sheaves), 6 or more broken wires in one rope lay length; 3 or more broken wires in one strand in one rope lay. (One rope lay is the distance necessary to complete one turn of the strand around the diameter of the rope.)
  • In pendant standing ropes, 3 or more broken wires in one lay length.
  • Wear of 1/3 of the original diameter of individual outside wires.
  • Kinking, crushing, cutting or unstranding, bird caging or other physical damaged that has distorted the shape of the wire rope.
  • Heat damage (check for burn marks, discoloration of the metal).
  • Excessive stretch or sharp reduction in the rope diameter.
  • Knots or splices (except eye splices) in a wire rope.
  • Missing sling identification, such as manufacturer, workload limit, diameter or size.

What can cause a wire rope to break:

  • Wear on areas in contact with hoist sheaves and drums.
  • Corrosion from lack of lubrication and exposure to heat or moisture (e.g., wire rope shows signs of pitting). A fibre core rope will dry out and break at temperatures above 120°C (250°F).
  • Fatigue from repeated bending even under normal operating conditions.
  • Overloading the safe working load limit. Follow manufacturers’ charts.
  • Mechanical abuse – crushing, cutting or dragging of rope.
  • Usage when frozen – if work is performed at lower than 15.5°C, the use of the sling should follow the manufacturer’s recommendations.
  • Kinks from improper installation of new rope, sudden release of a load or knots made to shorten a rope. A kink cannot be removed without creating a weak section. Discarding kinked rope is best.

Kinked wire rope
Kinked wire rope

Hazardous Waste

A waste is a by-product of your work or research that has no further use. If you work with chemicals, you are probably a hazardous-waste generator. A hazardous waste is any waste regulated by the Environmental Protection Agency (EPA).

Some examples of hazardous waste are:

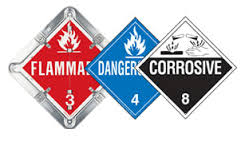
  • Flammable liquids, such as non halogenated solvents
  • Corrosive liquids, such as strong acids and bases
  • Solid oxidizers
  • Wastes that contain heavy metals and halogenated organics
  • Greases and oils

The first step in determining if you have a hazardous waste is to understand the materials that go into your process, how the materials are used, and how they flow into and out of the process. You must be aware of any potential reactions that might occur that could change the nature of the chemicals you are using. It is quite possible that your process could change hazardous materials into materials that are no longer hazardous, e.g., neutralization or complexing of an acid or base with a buffer compound. Though less common, you should also be aware of the potential to create hazardous materials during your process.

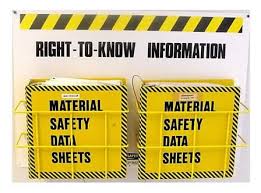
One important information source that can help you determine if your waste is hazardous is the Material Safety Data Sheet (MSDS) for each chemical you use. Before working with any chemical, you should review the MSDS and understand the hazards of the material. More information on working with hazardous materials can be found in the Chemical Hygiene and Safety Plan. As a general rule, you should never work with hazardous materials and generate hazardous waste without being properly trained in safe handling and management practices for such work. Once you have an understanding of the materials in your waste, you can proceed to evaluate the waste as hazardous for possible regulation. Your first responsibility as a hazardous-waste generator is to complete appropriate training. The Hazardous Waste Handling Facility (HWHF) will accept waste only from generators who have completed the training course.

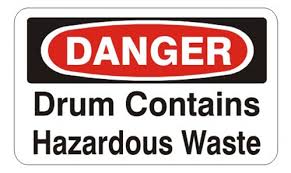
If any of the definitions below apply to your waste, the container must be labeled as “Hazardous Waste,” and managed accordingly. If you are unsure whether your waste is hazardous, you may simply label the waste, and then call your Generator Assistant. There is no penalty for labeling waste that may later be determined to be nonhazardous waste.

Characteristic Waste:

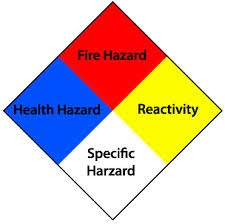
Characteristic waste is considered hazardous based on specific properties of the material. The four basic properties that can define a characteristic waste are ignitability, corrosivity, reactivity, and toxicity.

Ignitability:

A waste is ignitable if:

(1) it is a liquid with a flash point of less than 140°F, unless the liquid is an aqueous alcohol solution with less than 24% alcohol by volume;

(2) it is not a liquid and is capable of causing fire through friction, absorption of moisture, or spontaneous chemical changes;

(3) it is an ignitable compressed gas; or

(4) it is an oxidizer.

Examples of Ignitable Waste

Ignitable liquids: acetone, acetonic, benzene, hexanes, methanol, ethanol, isopropanol, toluene, xylene, methyl ethyl ketone, lacquer thinner.

Ignitable compressed gases: hydrogen, methane, acetylene, propane, butane, spray-paint cans.

Oxidizers: ammonium per sulfate, sodium nitrate, potassium permanganate, sodium perchlorate, hydrogen peroxide (aqueous solution greater than or equal to 8%), potassium peroxide.

Corrosivity

A waste is corrosive if:

(1) it is aqueous and has a pH ≤2 or ≥12.5, as measured by a pH meter;

(2) it is a liquid and corrodes steel at a rate greater than ¼-inch per year in a standard corrosivity test;

(3) it is not aqueous, and when mixed with an equivalent weight of water, produces a solution having a pH ≤2 or ≥12.5 (in California only); or

(4) it is not a liquid, and when mixed with an equivalent weight of water, produces a solution that corrodes steel at a rate greater than ¼-inch per year in a standard corrosivity test .

Examples of Corrosive Waste

Corrosive aqueous liquids: hydrochloric acid, sulfuric acid, nitric acid, perchloric acid, acetic acid, sodium hydroxide solution, potassium hydroxide solution.

Reactivity

A waste is reactive if:

(1) it is normally unstable and readily undergoes violent change without detonating;

(2) it reacts violently with water;

(3) it forms potentially explosive mixtures with water;

(4) it generates toxic gases, vapors, or fumes when mixed with water;

(5) it contains cyanides or sulfides and can generate toxic gases when exposed to pH conditions between 2 and 12.5; or

(6) it is explosive under standard temperature and pressure conditions, or it can explode if subjected to a strong initiating source or heated under confinement.

Examples of Reactive Waste

Sodium metal, potassium metal, lithium metal, concentrated sulfuric acid, picric acid, trinitrobenzene, metal azides, amides, benzoyl peroxide.

Toxicity

A waste is toxic if:

(1) it can release sufficient amounts of specific toxic metals or organics in standard leaching or extraction tests ;

(2) it contains sufficient total amounts of specific toxic metals, organics, or asbestos ;

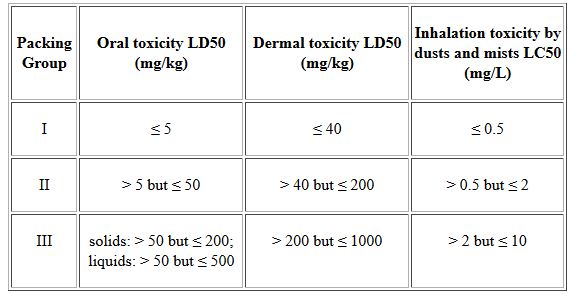
(3) it has an acute oral LD50 less than 2,500 milligrams per kilogram ;

(4) it has an acute dermal LD50 less than 4,300 milligrams per kilogram;

(5) it has an acute inhalation LC50 less than 10,000 parts per million as a gas or vapor ;

(6) it has an acute aquatic 96-hour LC50 less than 500 milligrams per liter in a standard aquatic toxicity test ;

(7) it contains specific known human carcinogens in a single or combined concentration equal to or exceeding 0.001% by weight;

(8) it has been shown through experience or testing to pose a hazard to human health or the environment because of carcinogenicity, acute or chronic toxicity, bioaccumulative properties, or persistence in the environment.

Examples of Toxic Waste

Waste containing the following metals or inorganics above specific limits: antimony, arsenic, barium, beryllium, cadmium, chromium, cobalt, copper, lead, mercury, molybdenum, nickel, selenium, silver, thallium, vanadium, zinc, asbestos, fluorides.

Waste containing the following organic constituents above constituent-specific limits: benzene, carbon tetrachloride, chlorobenzene, chloroform, cresols, 1,2-dichloroethane, methyl ethyl ketone, nitrobenzene, pyridine, tetrachloroethylene, trichloroethylene, PCBs.

Listed Waste:

The definition of a “listed waste” is more convoluted. The listed wastes that create the most questions are typically solvents. EPA regulations require us to consider how the solvent was used in the process. EPA considers listed waste to be hazardous, regardless of its concentration or physical characteristics.

Generally, the waste generator is the only person who can provide enough information for us to make this determination. The following examples are meant to illustrate the information required by the Waste Management Group in order to comply with EPA and state regulations.

Example 1: A Waste Is Described as 50% Acetone and 50% Hexane

Case 1—Assume your experimental procedure requires that you mix acetone and hexane in a 50:50 ratio, and that this mixture is used in your process. In this case, the listed-waste criteria would not apply, because the acetone was not at 100% before you used it in your process; instead, it was 50%. Therefore, only the characteristic criteria would apply.

Case 2—Suppose you use pure acetone as a solvent in one process, and pure hexane in a separate process. One day, you add 1 gallon of used or “spent” acetone to your waste container; the next day, you add 1 gallon of used or “spent” hexane. This waste is also a 50:50 mixture of acetone and hexane, but now since the acetone was at 100% when it was used in your process, the entire waste has to be managed as a listed waste.

Example 2: A Waste Is Described as 4% Methylene Chloride, 48% Phenol, and 48% Chloroform

Case 1—Assume your experimental procedure requires a mixture of methylene chloride, phenol, and chloroform in a 4:48:48 ratio prior to use in your experiment. After use, this is added to your waste container. In this case, because the methylene chloride added to the mixture was less than 10% before use, only a characteristic waste code applies.

Case 2—Assume that this mixture occurred after the experimental process. One day, 2,400 mL of a 50:50 mixture of phenol chloroform is added to your waste container. A few days later, 100 mL of used 100% methylene chloride is added to this same container. In this scenario, the entire waste container is subject to the listed-waste rule, because the concentration of methylene chloride was greater than 10% when it was added to the waste container.

These examples also illustrate the need to maintain an accurate accumulation log .Follow-up phone calls by your Generator Assistant can be minimized or avoided by doing the following:

  1. Review the list of chemicals in Table 1-1; use nonhazardous substitutes, if possible.
  2. List the concentrations of all waste constituents.
  3. Fax copies of detailed accumulation logs.
  4. Tell Waste Management if the material is used or surplus unused material.
  5. 5.Discuss your generating process with your Generator Assistant.

Chemical Compatibility:

Incompatible chemical wastes should never be mixed together. Uncontrolled chemical reactions may endanger your safety and the safety of those around you. The act of mixing together separate wastes may also result in a regulatory violation for unpermitted treatment. Benchtop treatment may be an alternative if your goal is to avoid mixed-waste charges or you are generating nitric acid wastes

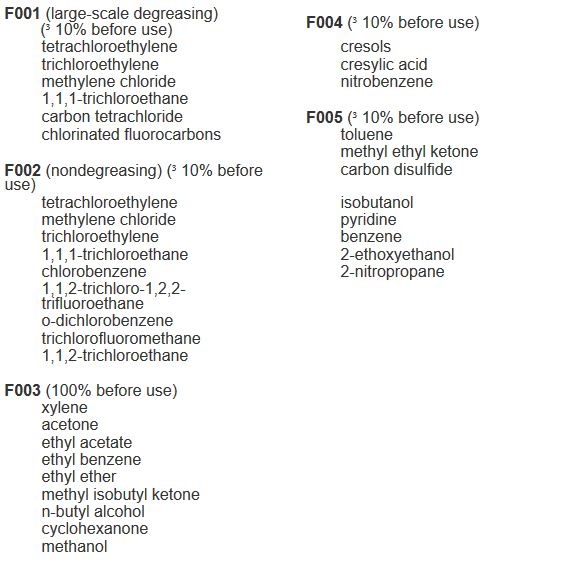
EPA F-Listed Hazardous Wastes

F-Listed hazardous wastes include spent solvents used in degreasing or other solvent operations, and various spent solvents that are no longer useful for their original purpose.

Federal Listed Hazardous Wastes

The Importance of the Waste Generator

If you generate hazardous waste, you have an important role to play in assuring that we manage that waste in an environmentally conscious manner and in compliance with all regulations. The waste generator is the only person with reliable and credible knowledge of the waste constituents and of how the waste was created. We often have to ask questions about the waste-generating process, and the generator, not a third party, is the only source of that information.

Your first responsibility as a hazardous-waste generator is to complete appropriate training. The Hazardous Waste Handling Facility (HWHF) will accept waste only from generators who have completed

Hazardous-waste regulations dictate that you, as the generator, are responsible for the complete and accurate characterization of your waste. Precise characterization is essential to ensure

  • Safe handling.
  • Protection of the environment.
  • Compliance with federal and state packaging requirements.
  • Compliance with land-disposal restrictions.
  • Acceptance of the wastes by appropriate recycling or disposal facilities.

Characterization:

Because most chemical waste is generated during specific processes in the course of your activities or experiments, you should know the chemical content of your waste from your “knowledge of the process” you used to generate it . In fact, the individual generating the waste is, in most cases, recognized as a more accurate source than certified analytical laboratories for specifying components and their concentrations in a given waste sample. Most hazardous waste generated at Berkeley Lab can be characterized through process knowledge. However, this approach must be supported by precise, documented information . To use and justify process knowledge for characterization, you must

  • Know the hazardous properties of all chemicals used
  • Have a thorough understanding of how the chemicals were used
  • Understand the chemistry of the reaction to determine if hazardous chemicals were produced where none existed before
  • Know whether the process converted hazardous chemicals to nonhazardous ones

Hazardous Waste Characterization Criteria

Once you have determined that your waste is hazardous and have identified the type(s) of hazard(s), all hazardous and nonhazardous components must be fully identified and documented. It is important to account for 100% of the contents of each waste container, including trace amounts of known hazardous components or other materials of concern (such as nanomaterials). A common problem is the failure to recognize that water and hydrogen ions (pH), if present, must be listed as components.

Hazardous-waste characterization may be achieved in the following ways:

By maintaining records (logs) of accumulation that draw upon knowledge of the procedures and processes that generated the wastes. The logs contain an entry each time a chemical is added to a container and a link to the forms. To use and justify process knowledge for containers with repetitive additions of various constituents, this record must be a timely and accurate reflection of what has been added to the container. When the container is no longer needed, this record becomes the basis to develop summaries, which will be provided as part of a pickup request. For waste that is collected in this manner, this record of accumulation must accompany all subsequent document submittals to the Waste Management Group.

By consulting an MSDS for each hazardous component, and listing quantitative information for all hazardous and nonhazardous components.

By developing a generic description when the material has a well-known standard composition (e.g., waste alkaline batteries or a broken mercury thermometer).

By using analytical results from a certified laboratory on known, unchanging waste streams (i.e., a waste profile), or by using complete analytical results from a certified laboratory for each waste. Analytical results from a noncertified laboratory may be used if adequate analytical records and procedures are documented and available to the Waste Management (WM)Group of the Environment, Health, and Safety (EH&S) Division, but will only be considered as a qualified form of your process knowledge.

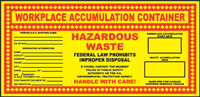
Labeling of Waste Containers:

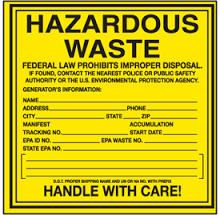
As a hazardous-waste generator, you are responsible for assuring that any container used to accumulate hazardous waste is properly labeled in order to meet regulatory requirements and assure the safety of those around you. The labeling requirement applies from the moment the first drop of waste is placed in the container. At that point, you must fill out and attach a hazardous-waste label to the waste container. Figure-1 is an example of a properly completed hazardous-waste label. If you have multiple containers of the same waste stream, each of a 60 ml size or greater, they should be labeled separately. Smaller containers (<60 mL) can be grouped together in a larger container and labeled as a unit.

The hazardous-waste label identifies:

  • the waste generator,
  • the contents of the container,
  • information on the hazardous characteristic(s) of the waste, and
  • establishes the waste-generation start date.

The waste generator must fill in the start date when the first addition is made to the waste container. Each primary waste container must have a label attached, indicating the composition of the material. A manufacturer’s label does not serve this purpose, even if proper hazard information is on the label.

All entries on the hazardous-waste label must be legible. It is recommended that entries be made with a permanent marker or a pen containing permanent ink. Ballpoint pens, pens with water-soluble ink, or pencils should not be used to fill out hazardous-waste labels. For large primary waste containers such as carboys, the hazardous-waste label should be affixed to an area of the container that is easily visible for inspection and emergency-response purposes. A waste container that is too small for a label can be placed in a ziplock plastic bag, with a hazardous-waste label affixed to the bag. If this method is used, be sure there is a very clear association between the hazardous-waste label and the actual primary waste container.

The “Contents” section of the Label can be completed using one of the following three approaches:

  1. By chemical name. If the material is a mixture, identify at least two or three of the major constituents that contribute to the primary hazard(s), including nonhazardous constituents, if appropriate. For waste containing nanomaterials, the description must include “contains nanomaterials.”

Examples: 1 M hydrochloric acid, aqueous solution; used acetone; contains acetone, hexane, methanol. Remember, if the composition is changing due to repetitive additions of compatible waste materials, maintain an accumulation log for the container, and record each entry on the log.

Figure 1. Example of a properly completed hazardous-waste label.

2. By manufacturer and specific product (for example, trade name or number, catalog number, etc.), including the primary hazardous materials listed in the MSDS for the specific product.

Example: BioRad protein assay dye reagent contains methanol and phosphoric acid.

Chemical identification information of manufactured products may also be found in the Aldrich Catalog of Fine Chemicals; the NIOSH Registry of Toxic Effects of Chemical Substances; and The Merck Index: An Encyclopedia of Chemicals, Drugs, and Biologicals.

3. By complete generic description of the material, only if the material is a mixture with a well-known standard composition. The description should indicate whether the material is new, has exceeded its shelf life, is spent, etc. If the material is a process waste, such as a cleaning agent or an etching bath, list all of the potential contaminants from the process in addition to the known constituents. For machine coolants, identify the metals for which the coolants were used. The generic description must be sufficiently complete to adequately characterize the waste material.

Example: Chromic acid dip-tank waste with copper. “Photochemicals” is insufficient because a wide variety of chemicals are used in photoprocessing. The description must be more specific, such as “alkaline photo developer” or “used photo fixer with chromate bleach.”
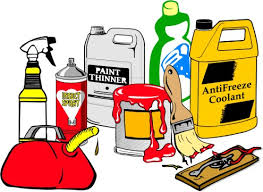
Flammable Wastes

Accumulation of flammable wastes must be in accordance with the National Fire Protection Association (NFPA) and Occupational Safety and Health Administration (OSHA) safety guidelines. NFPA 45, Fire Protection for Laboratories Using Chemicals, Table-1 (2004 Edition), and OSHA 1910.106d, Table H-12 restrict the sizes and types of containers that can be used for storage of flammable liquid waste in the workplace.

Flammable or ignitable wastes may not be accumulated in plastic containers of any type other than a listed and approved safety can (Figures 2 and 3 show examples of flammable waste cans). Approved, reusable safety cans are available from the Waste Management Group in 5-, 2.5-, and 1-gallon capacities. If you have small amounts of flammable waste, glass containers may be used, but the maximum allowable waste quantity in a glass container is 1 pint for Class IA liquids, and 1 quart for Class IB liquids

can image

image

Figure 2. A 5-gallon flammable waste can.                Figure 3. A 2.5-gallon flammable waste can.

  Figure 4. Glass bottles suitable for Class 1A flammable liquids (1 pint) or Class 1B flammable liquids (1 quart).

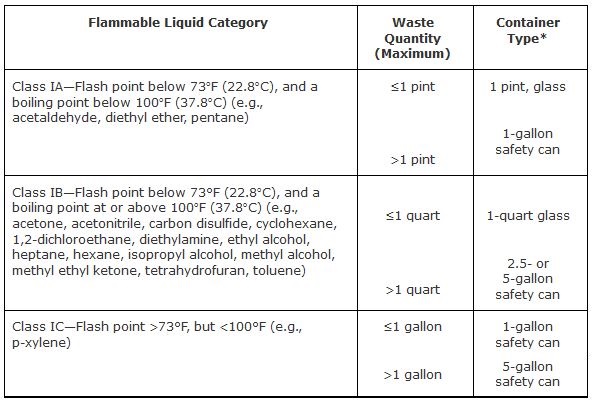
Table 1. Appropriate Containers for Small Quantities of Flammable Liquids

Waste Accumulation Area (WAA)

A Waste Accumulation Area (WAA) is a storage area designed for the accumulation of hazardous wastes for up to 90 days, in total quantities that can exceed 55 gallons (208 liters) of hazardous waste, 1 quart (0.946 liter) of extremely hazardous waste, or 1 quart (0.946 liter) of acutely hazardous waste. Berkeley Lab policy allows the accumulation of hazardous waste in a WAA for a maximum of 60 days to assure compliance with state regulations. This is not an HWHF Permit condition. The 60-day storage period begins on the date (called the “WAA receival date” or the “accumulation start date”) when waste is first placed in the container.

WAAs offer benefits to large-quantity waste generators. They provide a single area for the accumulation of large quantities of waste, and in the event of a spill, they prevent hazardous materials from entering the environment by means of required secondary containment. In addition, they contain emergency equipment in the event of a spill or release. The actual need for a WAA is best determined through consultation between the waste-generating organization and the Generator Assistant. A WAA cannot be established without prior EH&S approval.

The physical requirements for WAAs include:

  • Secondary containment
  • Shelter from the elements
  • Controlled access
  • Appropriate signs
  • A method to separate incompatible wastes
  • Sufficient access to allow pickup of waste
  • A washable surface (e.g., concrete or asphalt)

Where possible, the WAA should be a distance of approximately 50 feet from sanitary sewers or storm drains. The WAA must also be located at least 50 feet from the facility property line if flammable or reactive waste is being accumulated.

The following safety equipment must be maintained at or near all WAAs:

  • Portable fire extinguisher and/or fixed fire-suppression system
  • Emergency spill kit
  • Emergency eyewash and safety shower
  • Telephone (either at the WAA or nearby, with a sign indicating the direction to the nearest phone)
  • Personal protective equipment (e.g., gloves, safety glasses)
  • Appropriate hazard warning signs (e.g., “Flammables,” “Hazardous Waste Area”)
  • Posted contingency plan for dealing with spills and other accidental releases of hazardous wastes
  • Posted names and telephone numbers (day and night) of responsible individuals (WAA manager and alternate)
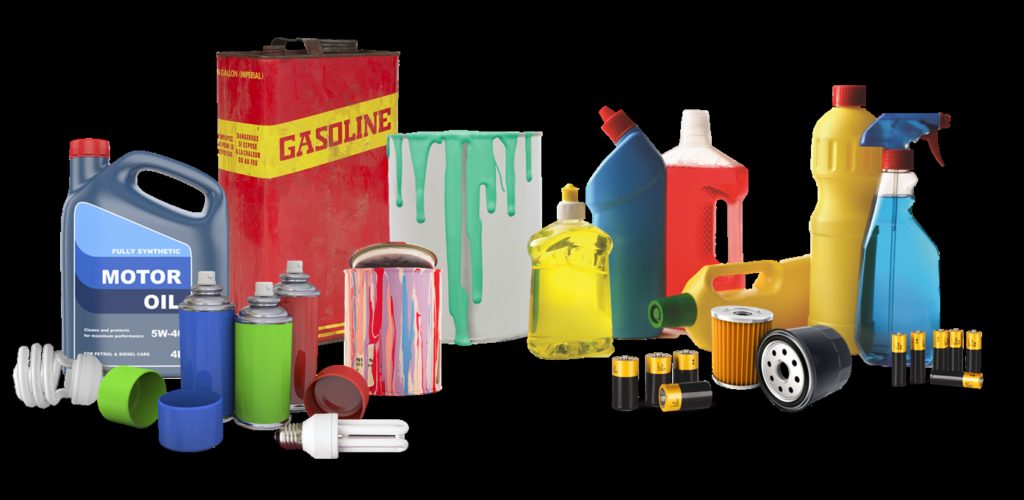
Universal Wastes

Universal wastes include batteries, fluorescent lamps, aerosol cans, mercury-containing equipment, electronic devices, cathode-ray tubes, and broken cathode-ray tube glass. Because properly managed universal waste poses a lower immediate risk to people and the environment, it can be handled and transported under more relaxed rules than hazardous wastes. However, universal wastes do contain hazardous materials and must therefore be taken to a designated handler or recycler and processed in compliance with universal waste regulations.

Batteries

Waste Management provides green collection buckets for used nickel-cadmium; nonspillable, nonleaking lead acid; and alkaline batteries. Place your batteries in the green collection bucket (Figure -5). All 9-V batteries and batteries with terminals on the same side must have the leads taped to prevent the possibility of fire or sparking. The buckets are emptied once per quarter or as needed. Automotive batteries (lead acid) can be sent to salvage as long as the caps are intact and the body is not damaged or cracked. Only batteries should be placed in the green bucket. Other items such as computer parts or mercury-containing devices present safety hazards and should be collected elsewhere.

If you have leaking lead-acid batteries, these are regulated as hazardous waste and must be requisitioned in the normal process.                                                              Figure-5

Universal Waste Definition of “Battery”?

Battery means a device consisting of one or more electrically connected electrochemical cells which is designed to receive, store, and deliver electric energy. An electrochemical cell is a system consisting of an anode, cathode, and an electrolyte, plus such connections (electrical & mechanical) as may be needed to allow the cell to deliver or receive electrical energy. The term battery also includes an intact, unbroken battery from which the electrolyte has been removed.

Waste Management Requirements for Small Quantity Handlers of Universal Waste Batteries:

(a) Universal waste batteries. A small quantity handler of universal waste must manage universal waste batteries in a way that prevents releases of any universal waste or component of a universal waste to the environment, as follows:

(1) A small quantity handler of universal waste must contain any universal waste battery that shows evidence of leakage, spillage, or damage that could cause leakage under reasonably foreseeable conditions in a container. The container must be closed, structurally sound, compatible with the contents of the battery, and must lack evidence of leakage, spillage, or damage that could cause leakage under reasonably foreseeable conditions.

(2) A small quantity handler of universal waste may conduct the following activities as long as the casing of each individual battery cell is not breached and remains intact and closed (except that cells may be opened to remove electrolyte but must be immediately closed after removal):

(i) Sorting batteries by type;

(ii) Mixing battery types in one container;

(iii) Discharging batteries so as to remove the electric charge;

(iv) Regenerating used batteries;

(v) Disassembling batteries or battery packs into individual batteries or cells;

(vi) Removing batteries from consumer products; or

(vii) Removing electrolyte from batteries.

(3) A small quantity handler of universal waste who removes electrolyte from batteries, or who generates other solid waste (e.g., battery pack materials, discarded consumer products) as a result of the activities listed above, must determine whether the electrolyte and/or other solid waste exhibit a characteristic of hazardous waste identified.

(i) If the electrolyte and/or other solid waste exhibit a characteristic of hazardous waste, it is subject to all applicable requirements . The handler is considered the generator of the hazardous electrolyte and/or other waste and is subject .

(ii) If the electrolyte or other solid wast

Waste Management Requirements for Large Quantity Handlers of Universal Waste Batteries:

(a) Universal waste batteries. A large quantity handler of universal waste must manage universal waste batteries in a way that prevents releases of any universal waste or component of a universal waste to the environment, as follows:

(1) A large quantity handler of universal waste must contain any universal waste battery that shows evidence of leakage, spillage, or damage that could cause leakage under reasonably foreseeable conditions in a container. The container must be closed, structurally sound, compatible with the contents of the battery, and must lack evidence of leakage, spillage, or damage that could cause leakage under reasonably foreseeable conditions.

(2) A large quantity handler of universal waste may conduct the following activities as long as the casing of each individual battery cell is not breached and remains intact and closed (except that cells may be opened to remove electrolyte but must be immediately closed after removal):

(i) Sorting batteries by type;

(ii) Mixing battery types in one container;

(iii) Discharging batteries so as to remove the electric charge;

(iv) Regenerating used batteries;

(v) Disassembling batteries or battery packs into individual batteries or cells;

(vi) Removing batteries from consumer products; or

(vii) Removing electrolyte from batteries.

(3) A large quantity handler of universal waste who removes electrolyte from batteries, or who generates other solid waste (e.g., battery pack materials, discarded consumer products) as a result of the activities listed above, must determine whether the electrolyte and/or other solid waste exhibit a characteristic of hazardous waste identified.

(i) If the electrolyte and/or other solid waste exhibit a characteristic of hazardous waste, it must be managed in compliance with all applicable requirements . The handler is considered the generator of the hazardous electrolyte and/or other waste and is subject .

(ii) If the electrolyte or other solid waste is not hazardous, the handler may manage the waste in any way that is in compliance with applicable federal, state or local solid waste regulations.
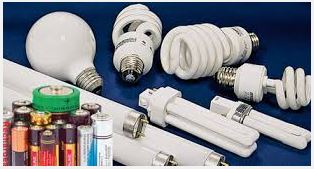
Fluorescent Lamps

Lamps such as fluorescent, neon, mercury vapor, high-pressure , sodium, metal halide, and high -intensity discharge are also examples of universal waste.

  • Fluorescent bulbs:
    • Linear, U-tube and circline fluorescent tubes
    • Bug zappers
    • Tanning bulbs
    • Black lights
    • Germicidal bulbs
    • High output bulbs, and
    • Cold-cathode fluorescent bulbs.
  • High intensity discharge bulbs:
    • Metal halide
    • Ceramic metal halide
    • High pressure sodium, and mercury vapor.
  • Mercury short-arc bulbs; and
  • Neon bulbs.

Important to Clean Up a Broken CFL Properly?

CFLs and the other light bulbs listed above contain a small amount of mercury sealed within the glass tubing. When a bulb breaks in your home, some of this mercury may be released as mercury vapor to minimize exposure to mercury vapor.

Aerosol Cans

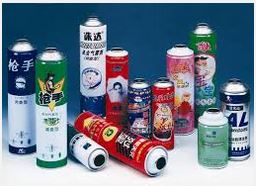
Waste aerosol cans are managed as universal waste and no longer require hazardous waste labeling, requisitions, etc. These aerosol cans are primarily used in Facilities and Engineering divisions and contain paints, degreasers, lubricants, penetrants, glass cleaners, etc. Collection points for Engineering and Facilities staff have been identified; however, if you are outside of these organizations and have an aerosol can you wish to dispose of, contact your Generator Assistant or Waste Management  for instructions. Note that aerosol cans with pesticides, herbicides, or catalysts cannot be managed as universal waste and must be submitted through the hazardous-waste requisition process.

Mercury-Containing Equipment

Unbroken thermometers, mercury-containing switches, thermostats, and other mercury-containing equipment should be placed in a container with packaging material to prevent breakage and labeled with a universal-waste label. A waste requisition is not required. Notify either your Generator Assistant or the Waste Management Group for pickup. Store in a safe location until pickup.

Labeling/Marking Requirements for Universal Waste Mercury-Containing Equipment:

A handler of universal waste must label or mark the universal waste to identify the type of universal waste as specified below:

(1) Universal waste mercury-containing equipment (i.e., each device), or a container in which the equipment is contained, must be labeled or marked clearly with any of the following phrases: “Universal Waste-Mercury Containing Equipment,” “Waste Mercury-Containing Equipment,” or “Used Mercury-Containing Equipment.”

(2) A universal waste mercury-containing thermostat or container containing only universal waste mercury-containing thermostats may be labeled or marked clearly with any of the following phrases: “Universal Waste-Mercury Thermostat(s),” “Waste Mercury Thermostat(s),” or “Used Mercury Thermostat(s).”

Special Wastes

Empty Containers

Certain empty containers that previously held hazardous materials are exempt from hazardous waste regulations and can be discarded as solid sanitary waste (trash) under the following conditions:

  • The container must be <5 gallons in size.
  • The container did not contain an
  • extremely or acutely hazardous material.
  • Without rinsing, the container contains no drainable or pourable liquid when held in any orientation.
  • Without rinsing, the container contains no removable solids other than a thin, uniform layer of dried material or powder.

If your container meets the criteria listed above, the container may be thrown in the trash, and the following steps must be completed:

  1. The container must be deleted from the Chemical Management System, and the bar code must be removed from the container.
  2. The original label must be crossed out or marked with the word “EMPTY” to notify custodial staff, recyclers, or sanitary-waste engineers that it no longer contains hazardous materials, and can be discarded as solid sanitary waste.

Figure -6. The decision tree for the management of empty containers.

The decision tree shown below in Figure -6 can assist you in deciding how to properly dispose of your empty container.

Click the below link to download more details about hazardous wastes

 haz-waste-op-emerg-response

 hazardous-waste

 jhscworkplace

Hazardous Materials

Introduction

Hazardous materials (hazmat) are any material that has properties that may result in risk or injury to health and/or destruction of life or facilities. Many hazardous materials (hazmat) do not have a taste or an odor. Some can be detected because they cause physical reactions such as watering eyes or nausea. Some Hazardous Materials exist beneath the surface of the ground and have an oil or foam-like appearance. The substance can be identified from placards, labels or markings on the transporters.

Hazardous Material can be:

Corrosive Hazmat Materials:

are strong enough to eat away at steel drums or human skin. Because they can eat through the containers they are carried in, they are of special concern during transportation. Example: car battery acids ·

Ignitable Hazmat Materials:

present a fire hazard because they are flammable at relatively low temperatures. This causes a risk of explosion and the spreading of toxic gas over an area, as well as fire and smoke. Examples: paint removers, the chemical Benzene.

Reactive Materials:

can explode or release deadly fumes by mixing with water or reacting to heat or pressure. Examples: old weapons and ammunition, sodium metal, stannic chloride.

Radioactive Materials:

include materials with both high and low radioactivity that can lead to dangerous side effects for thousands of years. Most of these materials are produced at nuclear power plants and by research facilities.

Toxic Hazardous Materials:

consist of poisonous chemicals. People and animals exposed to these types of materials can develop severe health problems. Examples: lead, arsenic, mercury ·

Infectious Materials:

These materials are also toxic wastes, but are in a separate category. They consist of materials infected with some type of germ, bacteria, or virus that could cause disease in humans or animals. These types of materials often come from hospitals. Examples: hypodermic needles, human and animal waste.

Classification of Hazardous Materials:

The DOT has broad authority to regulate hazardous materials that are in transport, including the discretion to determine which materials shall be classified as “hazardous”. These materials are placed in one of nine categories, based on their chemical and physical properties. Based on the classification of the material, the DOT is also responsible for determining the appropriate packaging materials for shipping or transport. Finally, also based on the material classification, strict guidelines are furnished for proper labeling/marking of packages of hazardous materials offered for transport, and for placarding of transport vehicles.

Class 1: Explosives

Explosives 1.1A

Explosives 1.1L    Division 1.1 – Articles and substances having a mass explosion hazard

Explosives 1.2B Division 1.2 – Articles and substances having a projection hazard, but not a mass explosion hazard

Explosives 1.2L   Division 1.3 – Articles and substances having a fire hazard, a minor blast hazard, and/or a minor projection hazard, but not a mass explosion hazard

Explosives 1.3C

Explosives 1.3L   Division 1.4 – Articles and substances presenting no significant hazard (explosion limited to package)

1.4 Explosives B     Division 1.5 – Very insensitive substances having a mass explosion hazard

1.4 Explosives S

1.5 Blasting Agents D

    Division 1.6 – Extremely insensitive articles which do not have a mass explosion hazard

1.6 Explosives N            

Class 2 Gas

Flammable Gas Division 2.1 – Flammable Gas

Non-Flammable Gas Division 2.2 – Non-flammable, non-toxic gas (under pressure, inert, etc.)

Poison Gas

Division 2.3 – Toxic Gas

Class 3 Flammable Liquids (100 Degrees F or less closed cup):

Flammable 

Combustible

Class 4 Other Flammable Substances:

Flammable Solid Division 4.1 – Flammable Solid

Spontaneously Combustible Division 4.2 – Substances liable to spontaneous combustion

Dangerous When Wet Division 4.3 – Substances which, in contact with water, emit flammable gases

Class 5 Oxidizing Substances and Organic Peroxides:

Oxidizer Division 5.1 – Oxidizers

Organic Peroxide Division 5.2 – Organic Peroxides

Class 6 Toxic (Poisonous) and Infectious Substances:

PoisonHarmful: Stow Away From Foodstuffs Division 6.1 – Toxic Substances

Infectious Substances; Biological Material Division 6.2 – Infectious Substances

Class 7 Radioactive Material:

Radioactive   Division 7 – Radioactive Material

Class 8 Corrosives:

Corrosive Division 8 – Corrosives

Class 9 Miscellaneous Dangerous Goods:

Magnetized material
Elevated temperature goods
Miscellaneous Dangerous Goods

Dry ice
Asbestos
Environmentally hazardous substances
Life-saving appliances
Engines, internal combustion
Polymeric beads
Battery-powered equipment or vehicle
Zinc Dithonite

Hazardous Material packing groups:

  • Packing Group I – high danger
  • Packing Group II – medium danger
  • Packing Group III – Low danger

Division 4.1 Packing Groups:

Packing Group I – Pyrophoric liquids and solids.

Packing Group II – Positive test result when tested with a 25mm cube size sample at 140°C.

Packing Group III –      If one of the following is true:

  • A positive test is obtained in a test using a 100mm sample cube at 140°C and a negative test result is obtained in a test using a 25mm sample cube at 140°C and the substance is transported in packagings with a volume of more than 3 cubic meters.
  • A positive test result is obtained in a test using a 100mm sample cube at 120°C and a negative test result is obtained in a test using a 25mm sample cube at 140°C and the substance is transported in packagings with a volume of more than 450 liters.
  • A positive test result is obtained in a test using a 100mm sample cube at 100°C and a negative test result is obtained in a test using a 25mm sample cube at 140°C and the substance is transported in packagings with a volume of less than 450 liter

Division 4.3 Packing Groups:

  • Packing Group I – Material reacts vigorously with water at ambient temperatures and demonstrates a tendency for the gas produced to ignite spontaneously,  or which reacts readily with water at ambient temperatures such that the rate of evolution of flammable gasses is equal or greater than 10 liters per kilogram of material over any one minute
  • Packing Group II –  Material reacts readily with water at ambient temperatures such that the maximum evolution rate of flammable gases is equal to or greater then 20 liters per kilogram of material per hour, and the material does not meet the criteria for PG I
  • Packing Group III – Material reacts slowly with water at ambient temperatures such that the maximum evolution rate of flammable gases is greater than 1 liter per kilogram of material per hour, and the material does not meet criteria for PG I or II

Division 5.1 Packing Groups (liquids):

  • Packing Group I –  Any material that spontaneously ignites when mixed with cellulose in a 1:1 ratio or any material that exhibits a mean pressure rise time less than the pressure rise time of a 1:1 perchloric acid (50%):cellulose mixture
  • Packing Group II –  Material that exhibits a mean pressure rise time less than or equal to the pressure rise time of a 1:1 aqueous sodium chlorate solution (40%):cellulose mixture, and does not meet the criteria for PG I
  • Packing Group III – Material that exhibits a mean pressure rise time less than or equal to the pressure rise time of a 1:1 nitric acid (65%):cellulose mixture, and does not meet the criteria for PG I or II.

Division 5.1 Packing Groups (solids):

  • Packing Group I –  Material that exhibits a mean burning time less than the mean burning time of 3:2 potassium bromate:cellulose mixture.
  • Packing Group II – Material that exhibits a mean burning time less than or equal to the mean burning time of a 2:3 potassium bromate:cellulose mixture and does not meet the criteria for PG I.
  • Packing Group III – Material that exhibits a mean burning time less than or equal to the mean burning time of a 3:7 potassium bromate:cellulose mixture and does not meet the criteria for PG I or II.

Division 6.1 Packing Groups:

For poisons which are not inhalation hazards:

Class 8 Packing Groups:

  • Packing Group I – Material that causes full thickness destruction of intact skin tissue within 60 minutes, starting after an exposure time of three minutes or less.
  • Packing Group II – Material that causes full thickness destruction of intact skin tissue within 14 days starting after an exposure time of more than three minutes but not more than 60 minutes.
  • Packing Group III – Material that cause full thickness destruction of intact skin tissue within an observation period of up to 14 days starting after the exposure time of more than 60 minutes but not more than 4 hours

Hazardous Material Safety Transportation Security Plan:

Company Name                            

address 1                                 [Date]

address 2                               [Version#]

City, State, Zip                      [Copy 1 of 20]

Phone                           [Copyright Information]

Fax

Table of Contents:

  • Purpose Statement
  • Scope of Operations
  • List of Hazardous Materials
  • Personnel and Organization
  • Assessment Information

Risk Assessment 1

Risk assessment 2

  • Security procedures
  • Evaluation

Purpose Statement:

Company Name is committed to providing safe transport of hazardous materials. The company understands the heightened need for security to protect our community and way of life. This plan will identify the following;

  • Scope of Operations
  • List of Hazardous materials
  • Risk Assessment for Haz Mat transportation
  • Security procedures
  • Key personnel

Scope of Operations:

Give a brief, concise overview of your business. Identify products and services provided

List of Hazardous Materials:

In this section you’ll give a complete list of Hazardous Materials which may provide a threat when transported in commerce

Personnel and Organization:

Overview the organization of your business. This section should identify all key employees responsible for implementation of the plan. Include names, titles and responsibilities

  • First department
  • Second department
  • Third department

Assessment Information:

In this section you’ll describe the risks probable when transporting hazardous materials. Be sure to include any possible risk while the material is stored at the facility. You should also include a scale which identifies the risk factor for each task or area. For each assessment list all parties involved . Security risks may include Personnel, Vandalism, theft, and using common carriers.

Risk Assessment 1

Risk assessment 2

Security procedures and Controls:

In this section, you’ll describe the procedures that the company will put in place to eliminate, prevent, or minimize the risk.

Hazardous Material Disposal Tips:

DO:

  • Keep leftover product in original labeled containers so that you can refer to directions for use and proper disposal.
  • Always store in a safe, dry place.
  • Share unused materials with others only if product is in its original container with a label.
  • Locate firms for recycling oil, antifreeze, and batteries. Drain all containers thoroughly before disposal.
  • When the label indicates that containers can be placed in the trash, wrap the empty container in several layers of newspaper and dispose of with other household garbage.
  • Triple rinse all containers of water-soluble materials. Use rinse water according to label directions.

DON’T:

  • Do not dump leftover products.
  • It may be illegal and it contaminates the soil, water, and air.
  • Do not burn used or leftover products or product containers.
  • Burning may produce toxic fumes.
  • Do not bury leftover products or containers in your yard or garden.
  • Do not reuse pesticide or other chemical containers for other purposes.
  • Do not mix chemical products or wastes.
  • Do not put any liquids in the trash.
  • Do not put toxic materials such as pesticides in the trash or sewer.

Click the below link to down load the Hazardous material labels & shipping certification

Signage : Hazardous waste

 danger-goods

 hazardous-waste

 shipping_paper